
Choosing the right Drain Trim Set can change how a bathroom looks, drains, and performs over time. The trim includes visible parts such as the drain cover, flange, stopper, and overflow plate. These details may seem small. They are not.
A practical choice begins with the existing drain system. Measure the opening, check the pipe connection, and identify whether the basin uses a pop-up, grid, or stopper assembly. A polished brass set may suit a traditional vanity, while brushed stainless steel often handles daily contact with fewer visible marks. Finish matters, but compatibility matters more. A beautiful set that does not fit creates leaks, delays, and unnecessary replacement work.
Material quality also deserves careful attention. Solid brass, stainless steel, and durable plated finishes usually offer better service than thin, poorly protected coatings. Look for clear dimensions, installation instructions, replacement-part availability, and a reliable warranty. These signals do not guarantee perfection, but they support a more informed decision. No choice fits every bathroom.
Installation experience has taught many professionals to inspect threads, seals, and alignment before tightening anything. A drain can appear secure while a small gasket remains twisted underneath. That mistake is easy to miss. It may later leave a damp cabinet floor or a faint musty smell. A careful buyer should also consider cleaning habits, water hardness, fixture style, and future maintenance. The right Drain Trim Set should look appropriate today and remain practical after years of ordinary use. Check twice. Choose with evidence.
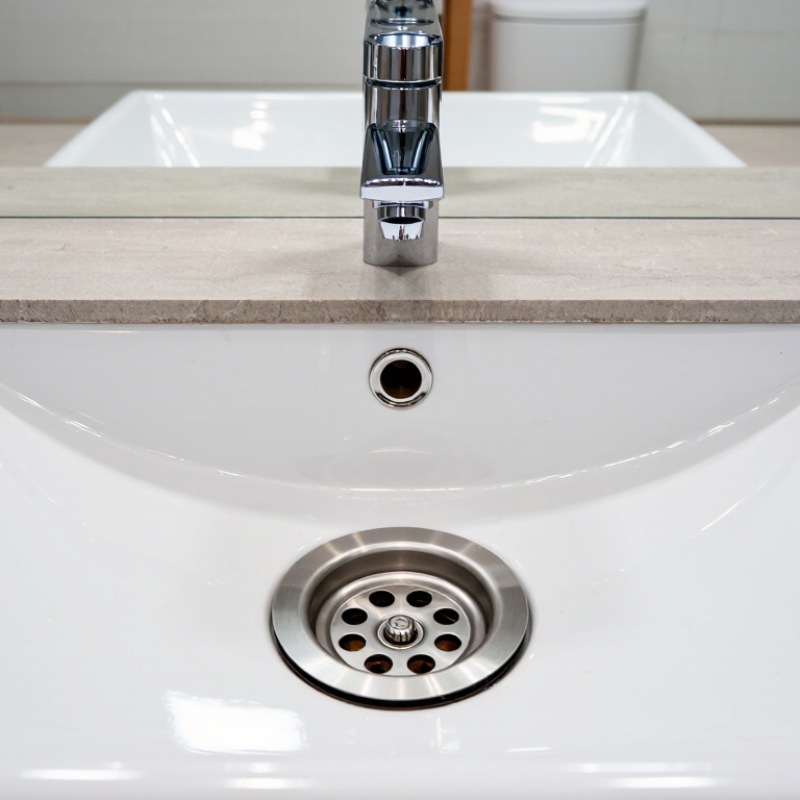
Choosing the right drain trim set starts with identifying every visible and hidden component. A lavatory assembly may include a flange, stopper, pivot rod, lift rod, overflow plate, and tailpiece. A bathtub set usually adds a waste-and-overflow body, trip lever, and drain shoe. These parts are not automatically interchangeable.
Measure the drain opening first. Many lavatory drains use a 1¼-inch connection, while tub waste systems commonly use 1½-inch piping. Check the overflow location, thread type, stopper clearance, and connection to the existing trap. A pop-up stopper needs space beneath the basin. A toe-touch stopper needs the correct internal threads. Small differences matter. A measurement can still be wrong.
Material and finish also affect reliability. Stainless steel, brass, and corrosion-resistant plated components generally suit wet environments better than thin, poorly protected metal. The EPA WaterSense specification limits labeled bathroom faucets to 1.5 gallons per minute and showerheads to 2.0 gallons per minute; these figures concern water use, not drain capacity, but they help prevent a common selection mistake. Confirm the drain assembly against ASME A112.18.2/CSA B125.2 requirements where applicable. In field work, I have found that photos alone miss thread depth and overflow alignment. Remove the old trim, inspect the gasket surfaces, and compare actual dimensions. Compatibility is proven by measurements, not appearance.
| Drain Type | Main Trim Components | Common Nominal Size | Typical Connection or Opening | Compatibility Requirements | Important Selection Checks |
|---|---|---|---|---|---|
| Lavatory Sink Drain | Drain flange, stopper, lift rod or push-button mechanism, pivot rod, tailpiece, and gasket | 1-1/4 in. drain outlet | Sink basin drain hole; usually connects to a 1-1/4 in. tubular trap assembly | The flange diameter and shank length must fit the basin opening and thickness; the stopper style must match the sink’s operating mechanism | Check overflow compatibility, pop-up clearance, tailpiece length, and whether the basin requires an overflow or a non-overflow drain |
| Vessel Sink Drain | Extended drain flange, pop-up or grid stopper, sealing gaskets, and retaining nut | Usually 1-1/4 in. outlet | Above-counter basin with a relatively deep or exposed drain body | The drain body must be long enough for the vessel thickness and countertop arrangement; use a non-overflow drain when the basin has no overflow opening | Measure basin thickness, countertop thickness, drain-hole diameter, and available space below the counter |
| Kitchen Sink Basket Strainer | Strainer basket, upper flange, sealing gasket, lower body, friction washer, and mounting nut | Commonly 3-1/2 in. sink opening | Connects to a tubular or continuous-waste assembly below the sink | The basket strainer must match the sink opening and the outlet configuration; a disposer-compatible flange is required when a food-waste disposer is installed | Confirm sink material, opening size, flange depth, cabinet clearance, and whether a standard basket or disposer flange is needed |
| Bathtub Waste and Overflow | Tub drain flange, stopper or strainer, overflow cover, overflow gasket, waste tee, and connecting tubes | Typically 1-1/2 in. waste and overflow piping | Tub drain opening plus a separate overflow opening in the tub wall | The waste-and-overflow assembly must align with both tub openings; the stopper linkage must suit the selected drain mechanism | Measure drain-to-overflow center distance, tub thickness, overflow-hole pattern, access-panel space, and required outlet direction |
| Shower Drain | Drain grate or cover, strainer body, clamping ring, waterproofing flange, and sealing gasket | Usually 2 in. drain outlet | Shower base, mortar bed, or bonded waterproofing membrane system | The drain must be designed for the shower construction method and must integrate with the waterproofing layer and 2 in. waste line | Verify grate size, adjustable height, flange type, waterproofing method, trap access, and required flow capacity |
| Floor Drain | Removable grate, drain body, clamping or flashing flange, strainer basket, and trap-priming connection where required | Common outlet sizes include 2 in., 3 in., and 4 in. | Concrete or tiled floor connected to a trapped drainage line | The body and grate must match the pipe diameter, floor thickness, waterproofing detail, and expected drainage load | Check grate load rating, outlet direction, height adjustment, debris access, and whether local rules require trap protection |
| Utility or Laundry Tub Drain | Drain flange, strainer or stopper, gasket, tailpiece, and connecting trap adapter | Often 1-1/2 in. outlet | Deep utility basin or laundry tub with a standard drain opening | The drain body must fit the basin material and thickness; the outlet must match the existing trap and waste piping | Prioritize corrosion resistance, cleanout access, stopper clearance, and compatibility with the tub’s drain-hole diameter |
| Universal Decorative Trim Replacement | Visible flange, cover plate, stopper, escutcheon, or trim ring; existing drain body may remain in place | Must correspond to the existing drain assembly | Used when updating visible hardware without replacing concealed plumbing | Thread pitch, diameter, stopper geometry, mounting method, and drain-body manufacturer specifications must match | Do not rely on appearance alone; remove the existing trim and compare thread size, retaining method, dimensions, and operating clearance |


